How to Change Port Number In Tomcat in 2021
Everyday now and then developers face one problem that port 8080 is already in use thus we have to change the port number of our server, Today we will see how to change port number in tomcat.
In the earlier tutorial, we have covered how to add tomcat server in eclipse.
1. How to Change Port Number in Tomcat
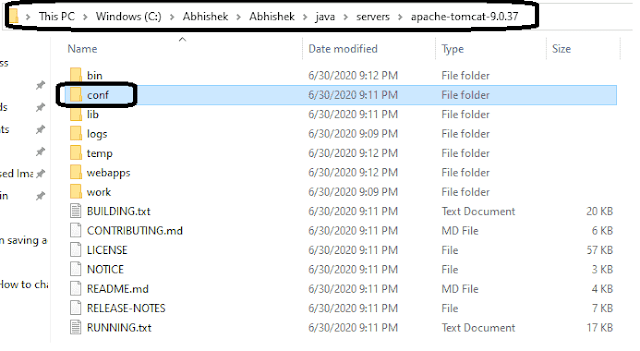
Go to the directory where you have downloaded your tomcat server
For example : C:\Abhishek\Abhishek\java\servers\apache-tomcat-9.0.37
Now go to the conf folder
 |
| Apache Tomcat Server Path |
Now you will see server.xml file under conf folder as shown below
 |
| Apache Tomcat Server XML |
 |
| Apache Tomcat Server Connector Port |
Now change the tomcat default port from 8080 to 9000 or any port you want above 7070 which is unique. Now this will be like
 |
| Apache Tomcat Server Connector Port Change |
To start the server simply goes to C:\Abhishek\Abhishek\java\servers\apache-tomcat-9.0.37\bin folder
 |
| Apache Tomcat Server Bin Path |
 |
| Apache Tomcat Server Startup File Path |
Logs will appear which show server started
Now our server start successfully at port 9000 and we will see the output:
 |
| Apache Tomcat Server Startup Logs |
 |
| Apache Server Tomcat Server Output |
2. How to Change Tomcat Port Number in Eclipse
Now we will see how to change tomcat port number in eclipse. We have covered how to add tomcat server in eclipse in an earlier tutorial.
We will now see the apache tomcat server that we configured in an earlier post in servers tab like below
 |
| Apache Tomcat Server Configured in Eclipse |
HTTP/1.1 pointing to 9000 so we change it to 9001 now or any other port you want.
 |
| Apache Tomcat Server Port Changed in Eclipse |
Now save the settings that we change using CTRL+S or Go to File > Save.
Now its show time we will start the server and verify our port changes.
To start the Server, we can either simply press Ctrl+Alt+R or right-click on the servers tab and then click on the start menu option.
 |
| Apache Tomcat Server Output Logs |
 |
| Apache Tomcat Server Output At Changed Port |
Conclusion
In this tutorial, we have covered how to Change Port Number in Tomcat from tomcat installation and How to change tomcat port number in eclipse.
Eclipse used it this Project creation is Eclipse IDE 2020-06 With JDK 14. We can simply download eclipse from Eclipse official site
Thanks for reading this tutorial so far. If you like this tutorial then please share it with your friends and colleagues. If you have any questions, doubts, suggestions, or feedback then please drop a comment and I'll try to answer your question.
So what do you think about this simple process to change tomcat port? It's Easy Right?
Happy Learning!!!
More Examples you may like


Comments
Post a Comment
If you have any doubts, Please let me know.